Photo Roll
An idea to make for a friend or loved one’s birthday is what we’ll call the photo roll. It is inspired by old-fashioned rolls of film. The idea is to use printed photos and walk whoever it is for through old times or good times with pictures of yourselves or others. It is the perfect thing to give if you want a fun project to work on and memories to be reminded of forever.
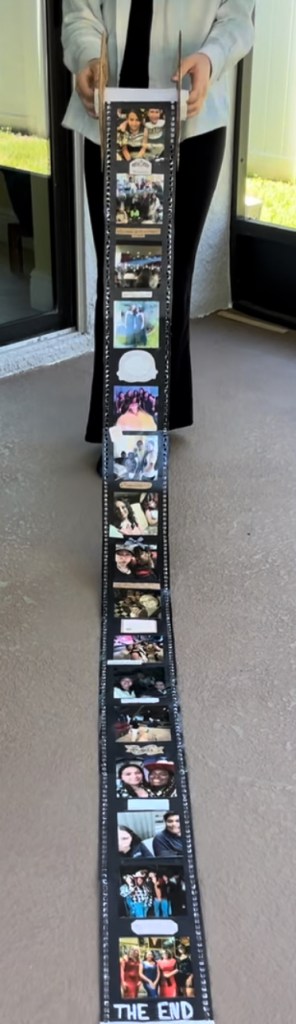
Here is the one I made!
Needed materials:
- Printed desired photos of the size you will make the photo roll (preferably photos that walk you through a timeline of memories)
- P.S. Walgreens has decently priced easy photo printing
- Cardboard cut out in two circles of the same size with holes in the sides for design of a film roll, and a hole in both middles that will fit an empty toilet paper roll
- Empty toilet paper or paper towel roll (the cardboard from the middle)
- Black paper, or paper with the design of a film roll on it
- Scissors, hot glue gun and hot glue sticks, hole puncher, stickers or any other scrapbooking materials desired
Directions:
- Make any needed cut outs in cardboard. A razor blade cuts easier and more precisely (but make sure you are extremely careful or have someone who is confident using a razor blade do it-my dad this part for me) or scissors work for this step.
- Carefully fit the empty toilet paper roll in the middle of the cardboard circles, and glue into both sides on the circles. Make sure you leave room for the width of the paper you have to put on it without folding it.
- If you have black paper: use hole punch and put straight rows of holes on both sides of the paper’s width leaving about an inch of paper on the outside and however much space you need to glue pictures and scrapbook decor on the inner part. If you have printed design of film roll, simply hole punch where the “holes” are on the paper. I looked up a picture on Canva (free account) of “old fashioned film roll” (or online) and printed that out to the size I needed. This did take a lot of ink, so a smarter way to do this would be to just use black paper.
- Fit and glue however many pieces of paper you need for the amount of pictures you have together with the holes lining up on the sides. I used tape to reinforce on the back.
- Glue the pictures down spacing them out a couple inches from each other down the middle of the papers. Make sure they are glued securely with no corners coming up.
- DECORATE!!! The best part. Have fun decorating however you want, with or without a theme. I made mine old fashioned looking with faded colored stickers and paper pieces. This project took me about a month to finish because I took my time and decorated each part well. If you are like me, you might get tired after doing some parts of this and want to come back later to finish more of it and keep the whole project looking fresh and enjoy making it.
- Glue the “start” of your timeline or order of pictures to the middle of the toilet paper roll. Gently fold/roll the pictures and paper up. Secure anything that needs more glue, tape, etc. Add any finishing touches you want. I tied it off with a ribbon to keep the pictures intact before my friend got to unroll it. Hope you loved making this!!!
